How Easy is It to Sew Body Pajamas
I'm a published children's book author, magazine writer, and technology blogger. In my spare time, I like to sew.
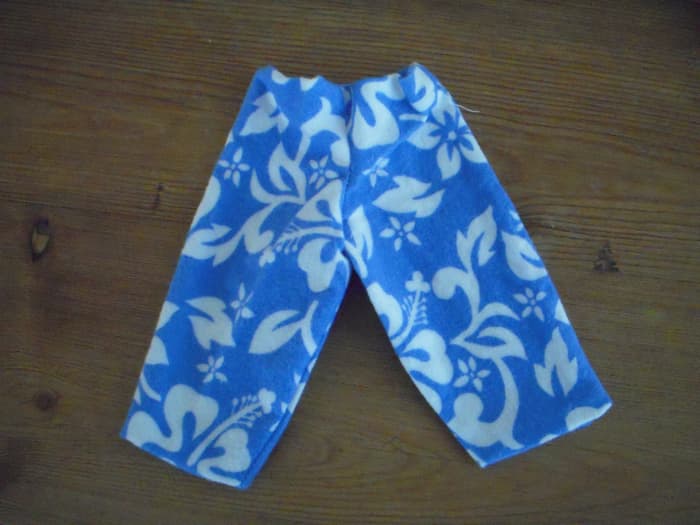
A mini version of a complete pair of pajama bottoms
Prokidwriter
How to Make Pajama Pants
Pajama pants are an easy sewing project for beginners. They can be hand-stitched, but a sewing machine makes the project very quick, and minimal machine skills are needed.
The directions given here are for a simple pair of pajama bottoms with an elastic waistband, from a pattern that uses two pattern pieces. Patterns vary, but the directions here are fairly common for this type of pajama bottom. The photos show a miniature version of the pattern pieces, just for clarity, so that you can see the whole view of the fabric pieces and the sewing process.
Materials for Sewing
To make a pair of pajama bottoms, you'll need some basic sewing supplies for machine and hand sewing:
- Sewing machine (with bobbin, needle, power source)
- Hand sewing needles
- Straight pins
- Scissors
- Tape measure
- Seam ripper (to take out mistakes)
- Sewing pencil (to transfer pattern marks onto fabric)
- Safety pins
You'll also need a pattern, fabric and notions—extra consumable sewing supplies—to complete the project. The back of the pattern envelope tells you how much fabric and what notions, in this case, elastic, to buy:
- Pajama pattern
- Thread, in color that matches fabric
- Fabric (see pattern back for exact details)
- 1/2" elastic for waistband (see pattern back for exact details)
For this project, I used cotton flannel for the fabric. My pattern called for 2.5 yards of 45" fabric. Always preshrink your fabric before cutting out the pattern. Preshrink by washing the fabric (assuming it is machine washable.) Iron the fabric before cutting.
Sewing Tips
- Take waist measurement at the belly-button, and hip-measurement around the fullest part of the hips.
- Pattern sizing has little relation to the sizing of store-bought clothes. Always go by measurements.
- Pajama pants patterns are very forgiving. Look for unisex patterns or those sized for the whole family.
- If you are between sizes, you can often cut the pattern out using both sizes. Read the pattern instructions for more information on how to adjust the pattern to your size before you cut.
- Always press open your seams so that they are flat.
Step 1: Prep the Project
- Take measurements: Your starting point is to measure the person who will wear the pajama bottoms. You'll need to measure the waist and the hips. These two measurements will help you determine what pattern size to buy. In general, you'll choose a size according to the hip measurement, since you'll be sewing an elastic waistband.
- Pick a pattern: Pick out a pattern at a sewing or fabric store. You can also print out a pattern from online sources like Simplicity (see section "Materials For Sewing" for a link.) Choose a pattern that has two or three basic pattern pieces (pants front, pants back, and possibly a waistband casing,) and that has an elastic waistband. The back of the pattern envelope tells you what materials you'll need to make the project, and how much yardage to buy.
- Buy materials: Check the list in the "Materials For Sewing" section and ensure you have the basic supplies. Purchase the yardage you'll need and the elastic for the waistband.
- Pre-shrink fabric: Assuming the fabric is machine washable, pre-shrink the fabric by washing and drying it. If the fabric isn't machine washable, and you still want to use it to make pajama pants, you can either not pre-shrink it at all, or, if the fabric can be ironed, pre-shrink by lightly steam ironing it, using a pressing cloth
- Iron pattern pieces and fabric: Make sure your pattern pieces are flat, without wrinkles, by ironing the pieces using a warm iron without steam. Iron the fabric as well, to make sure that it is flat and wrinkle-free.
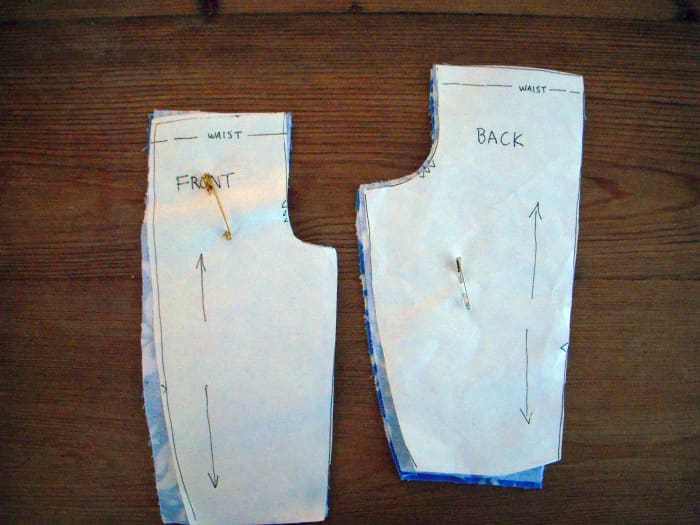
Fabric cut using pattern pieces. Fabric is cut with right sides together.
Prokidwriter
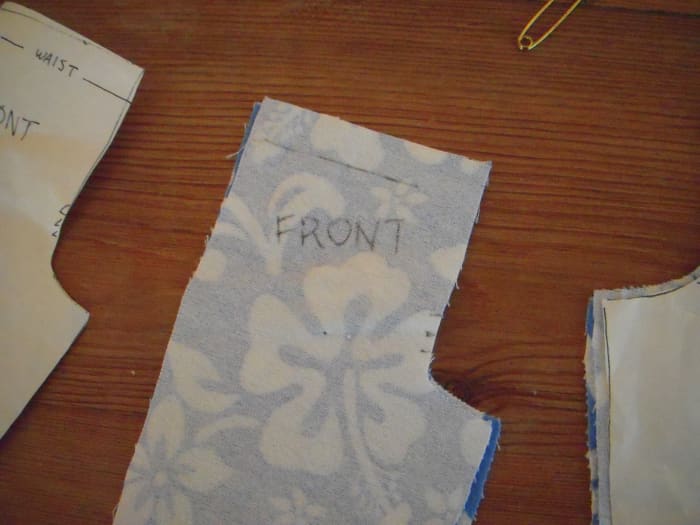
Important markings are transferred from the pattern onto the wrong side of fabric. Here, the waistline and center line markings are transferred to the fabric.
Prokidwriter
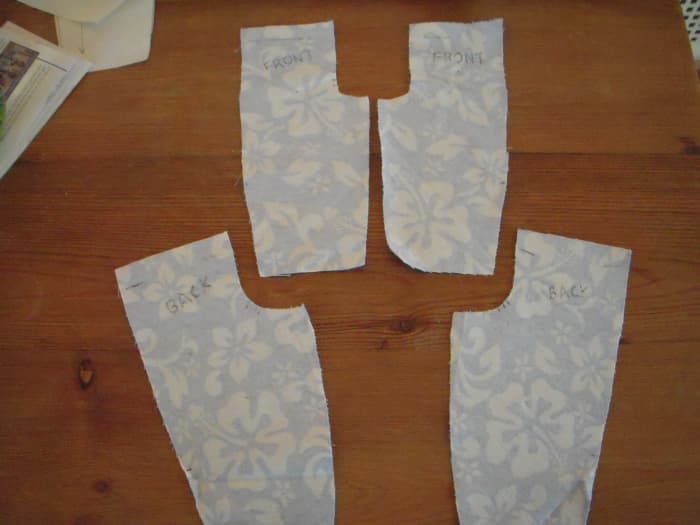
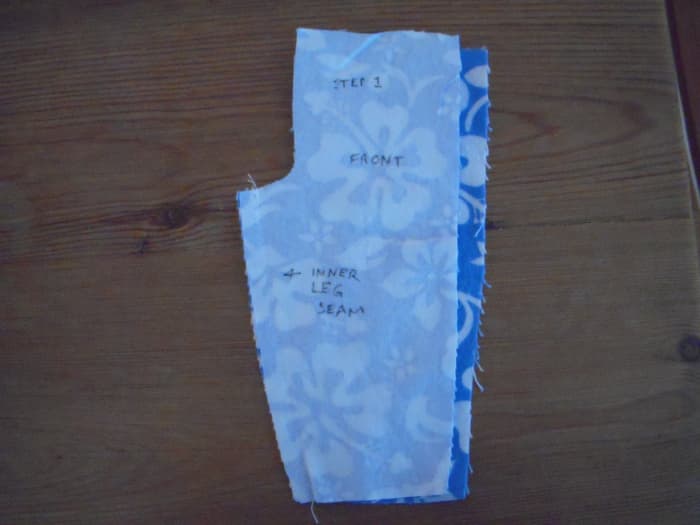
Two pattern pieces result in four pieces of cut fabric: two fronts and two backs.
prokidwriter
Step 2: Lay Out, Cut and Mark Pattern Pieces
Now that you have all your materials in place, and your fabric and pattern are ready to go, you're ready to cut out your pattern and sew! Carefully read the directions that came with the pattern and follow the recommended pattern layout for the fabric. Check to make sure that you've folded the fabric correctly (usually with right-sides together) and that you've followed the grain of the fabric correctly. Once you've oriented the pattern pieces correctly (and you've double-checked!) pin the pattern pieces onto the fabric and cut the fabric accordingly.
Now check the pattern markings, which will help you match up fabric pieces when you sew. You will find them on the center seam. Transfer those marks to the fabric pieces (onto the wrong side of the fabric) with a sewing pencil.
Scroll to Continue
Read More From Feltmagnet
Note: I used a Simplicity pattern with two pattern pieces, a front and back, which resulted in cutting two fabric fronts and two fabric backs, or four total cut pieces.
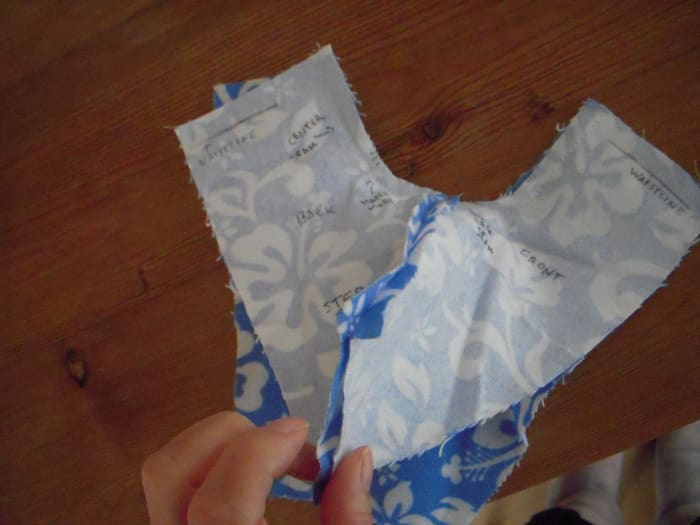
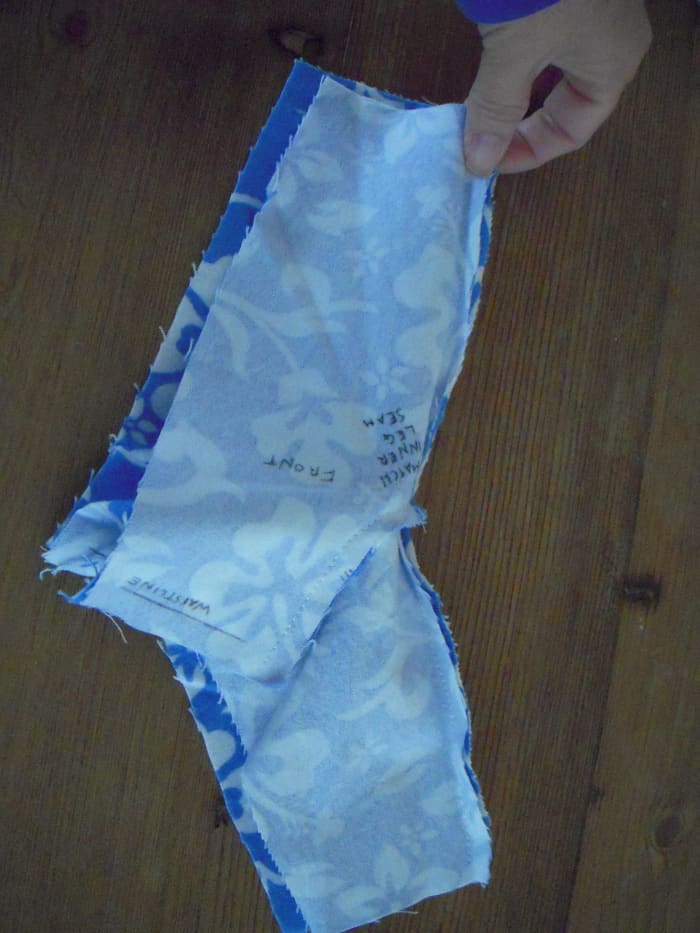
One front and one back piece with right sides together. Inner leg seam is the shorter seam.
Prokidwriter
Step 3: Sew the Inner Leg Seams
Take one front piece and one back piece and place them right sides together, and inner leg together. Sew the inner leg seam with the recommended seam allowance, usually 5/8", which is stated in the pattern sewing instructions.
Now repeat with the remaining front and back pieces. With a hot iron, press seams so that they are open and flat.
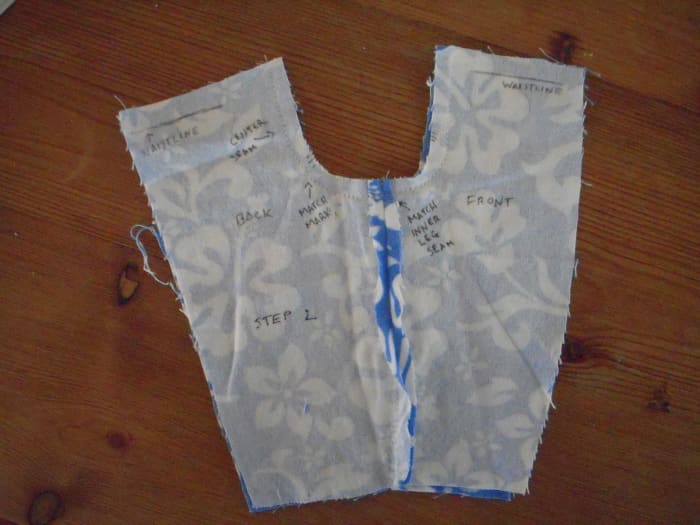
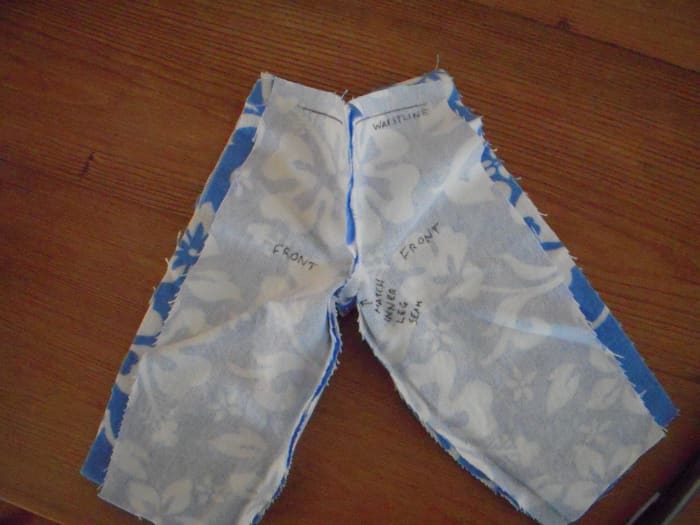
Match up markings and inner leg seam. Then sew the U-shaped center seam.
Prokidwriter
Step 4: Sew Center Seam
You will take the two pieces you've just created and prepare to sew the center seam. Pin the pieces with right sides together, matching the inner leg seams together, and matching up the marks. Carefully sew the center seam, removing the pins as you go. You'll end up with a big U-shaped piece made up of both fronts and both backs. Press open the center seam.
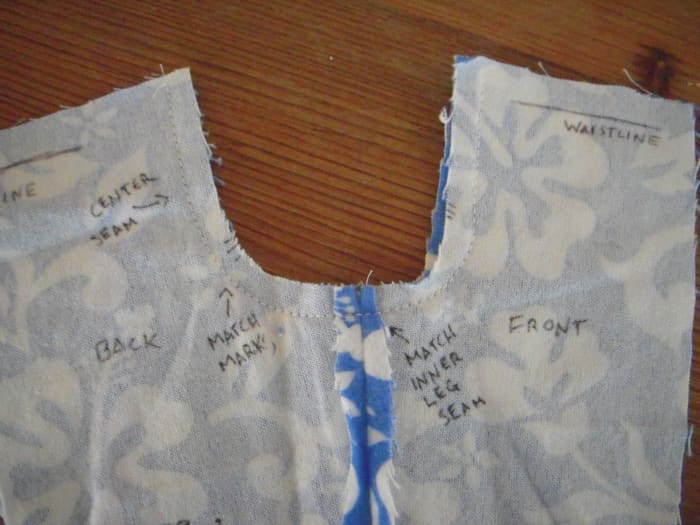
Alert! The center seam is NOT the pant inseam. It's the crotch seam and runs from front-to-back of the pants. You'll need to manipulate what you've sewn so that the pieces are where they are supposed to be, and what you've sewn look like pants.
Prokidwriter
Bring the top front and back piece together, right sides together. Same with the bottom front and back pieces.
Prokidwriter
Bring the inside leg seams together, and the waistbands together.
Prokidwriter
Until you end up with a pair of inside-out pajama bottoms. Check that you have a waistband on top and two long side seams. Note that the center seam runs front-to-back around the crotch.
Prokidwriter
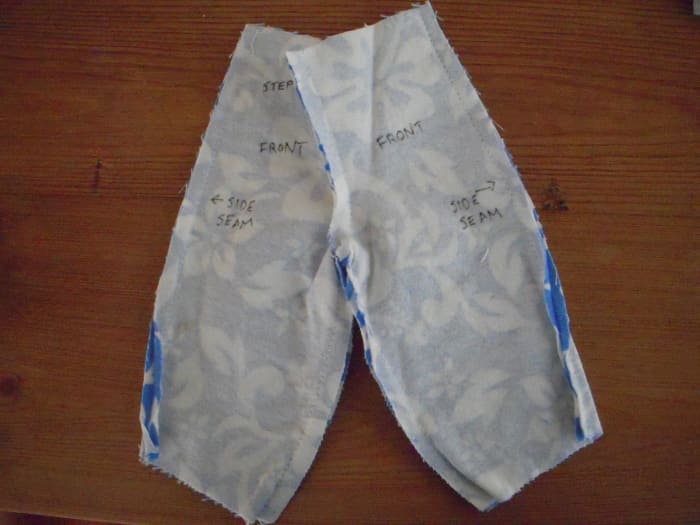
Sew long side seams.
Prokidwriter
Step 5: Sew Side Seams
Sewing the side seams often cause beginners some consternation. Look carefully at the shape you've just finished sewing. The center seam, the big U-shape, is what goes around your crotch from front to back, it's not the inseam to the pants. You don't want to simply sew up with sides with that big U-shape facing you.
This means you have to manipulate the piece so that the center seam follows the crotch line, fronts matching up with backs with right sides together, and that the waist-line matches up.
If this is confusing, try grasping the inside seams and matching them together, then matching up the waist-line and sides so that you have two front pieces facing you. You should end up with something that looks like an inside-out pair of pants, with the big U-shape now following the crotch line from front to back. Note that you should have fronts match up with back pieces, right sides together.
Once you have the right shape, sew both side seams. You should be sewing a front to a back along the side seam, ending up with an inside-out pair of pajama pants!
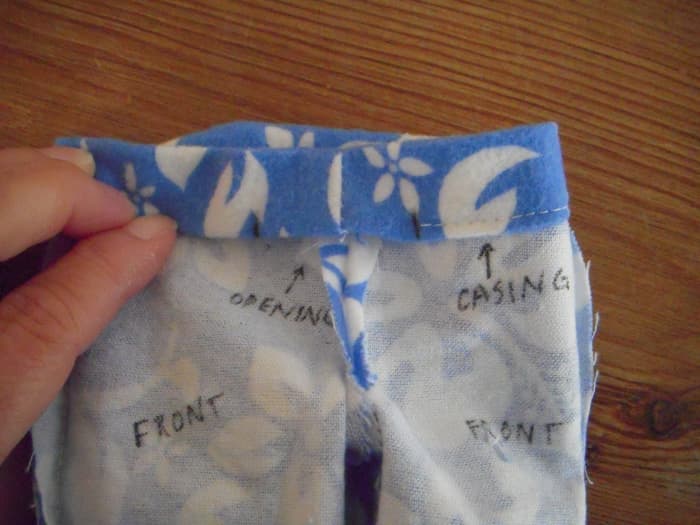
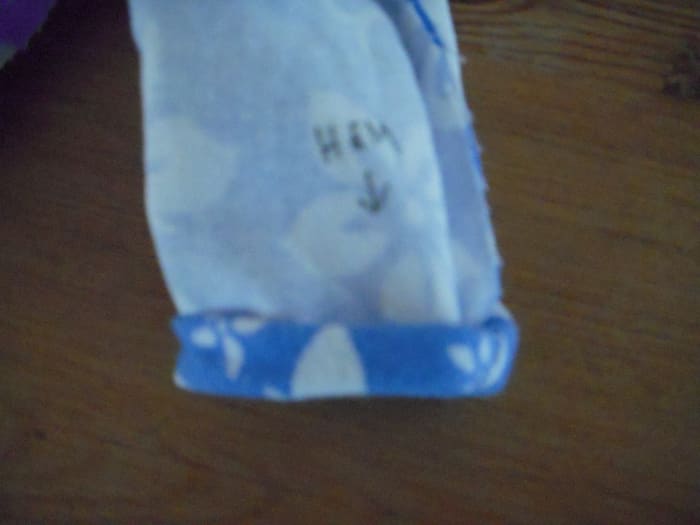
Casing is made by turning under 1" at waistline. The raw edge is turned under 1/4". Press before sewing. Leave an opening to insert elastic band.
Prokidwriter
Hem to desired length. Turn under raw edge about 1/2" and press. Turn under again, press and stitch to hem.
Prokidwriter
Step 6: Sew Waistband and Hems
To make the waistband casing, fold over the waistline raw edge about 1/4", wrong sides facing, and iron flat. Then fold over another 1" to the inside of the garment and press again. This will be your casing. Either hand-stitch or machine stitch carefully along the lower edge of the casing, leaving about a 2" opening to insert the elastic waistband.
Turn the garment right-side out.
Measure a length of elastic to fit the waist of the wearer, plus one inch. Example, if the wearer has a 28" waistline, you'll cut a 29" length of elastic.
Attach a safety pin to one end of the elastic and push it through the opening of the casing. When it is through, catch both ends of the elastic with the safety pin and try the pajama pants on. You can adjust the length of the elastic at this point.
Remove the safety pin and stitch together the ends of the elastic. Hand-stitch the casing closed.
Try on the pajama pants and turn up hems to desired length. Take them off and iron the edges. Trim any excess fabric, leaving about 1" extra for the hem. Turn under the raw edge about 1/2", press, and carefully hand or machine stitch the hem.
Now check for any stray pins, press your new pajama pants and enjoy wearing them!
KA Hanna (author) from America's Finest City on December 18, 2012:
Hey thanks, Kawi!
Kawika Chann from Northwest, Hawaii, Anykine place on December 18, 2012:
And I thought that it would be just a simple thing to sew a pair of housepants - I wondered what the other pieces was for and then after following along said 'aha' as it all came together in the end. Wow, that's cool. I guess the body does have some bumps here and there. Nicely done, cool looking material too. Voted you up/awesome. Peace. Kawi.
Source: https://feltmagnet.com/textiles-sewing/How-to-Sew-Pajamas
0 Response to "How Easy is It to Sew Body Pajamas"
Post a Comment